AudiocRaver
Loved and Remembered Emeritus Reviewer
More
- Preamp, Processor or Receiver
- Onkyo TX-SR705 Receiver
- Main Amp
- Crown XLS 1502 DriveCore-2 (x2 as monoblock)
- Additional Amp
- Behringer A500 Reference Power Amplifier
- Front Speakers
- MartinLogan Electromotion ESL Electrostatic (x2)
- Center Channel Speaker
- Phantom Center
- Surround Speakers
- NSM Audio Model 5 2-Way (x2)
- Subwoofers
- JBL ES150P Powered Subwoofer (x2)
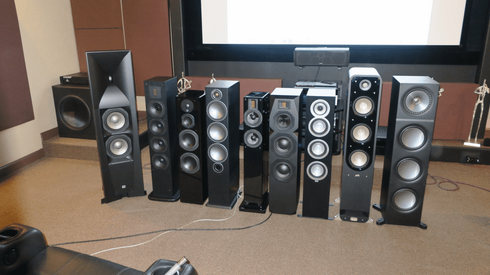
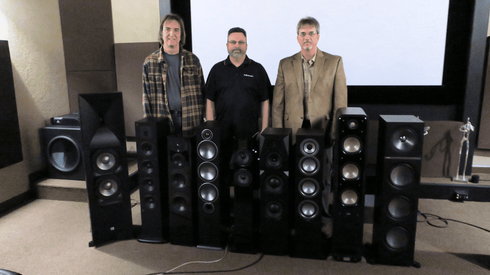
In the hallway between Sonnie's home and his home theater/listening room are standing 10, yes ten, count them TEN pairs of speakers to be evaluated over the next three days. This event will go down in the history books! (*Now 9 speakers after discovering the late arriving Klipsch speakers had a bad tweeter.)

As you can see, the Klipsch suffered a good bit of damage in shipping.
The Speakers (Alphabetical Order)
Chane A5rx-c ($860 for the upcoming A5.4 Gen3)
ELAC Uni-fi UF5 ($1000)
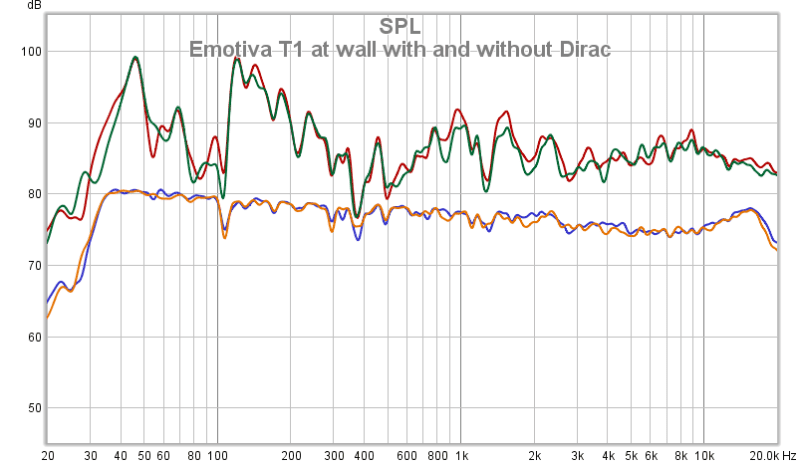
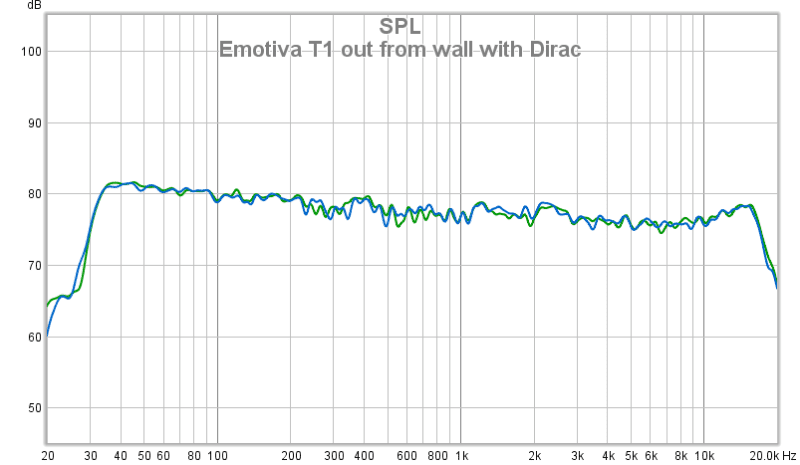
Emotiva T1 ($750)
JBL Studio 590 ($950)
KEF Q900 ($1200)
Klipsch RP-280F ($1080) *Eliminated due to bad tweeter - likely damaged in shipping.
Monitor Audio Bronze Series 6 ($1100)
Polk Signature S60 ($900)
Scansonic M9 ($1200)
SVS Prime Tower ($1000)
Equipment
Yamaha CX-A5100 Processor (Pure Direct Mode)
Emotiva XPA-1 Gen2 Class A/AB Monoblock Power Amps
OPPO UDP-205 (USB Input)
miniDSP DDRC-88 (Dirac Live - Testing with and without)
Canare 4S11 Speaker Cables
Epson Pro Cinema 4040 Projector / Elite Screen
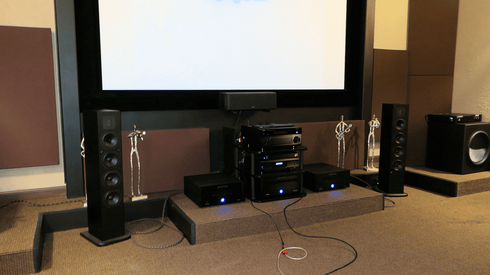
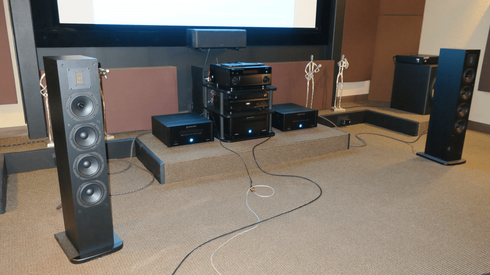
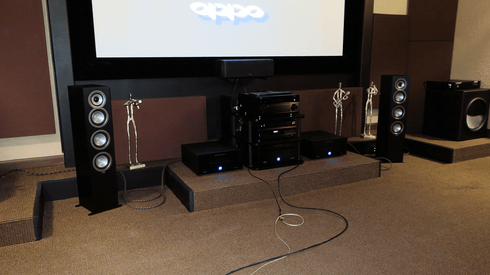
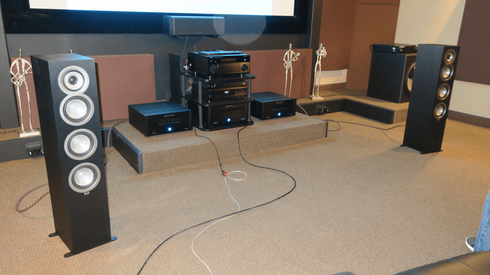
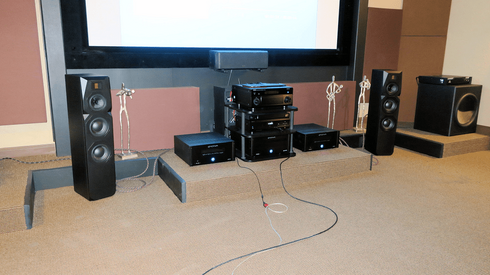
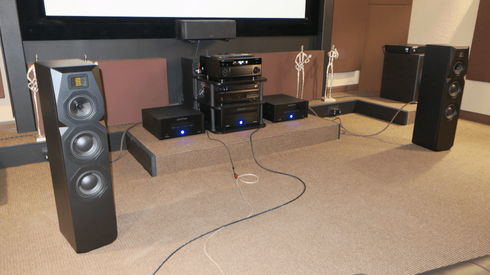
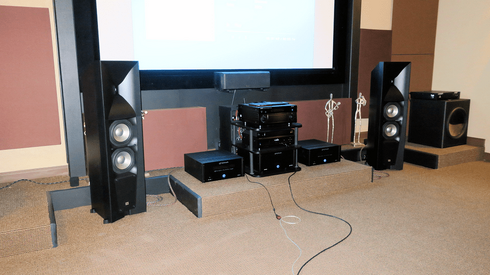
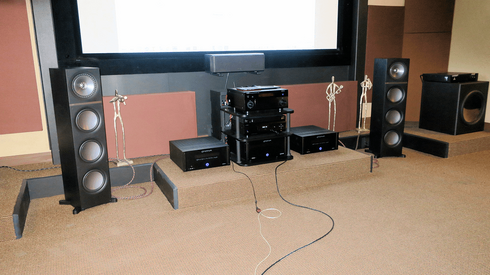
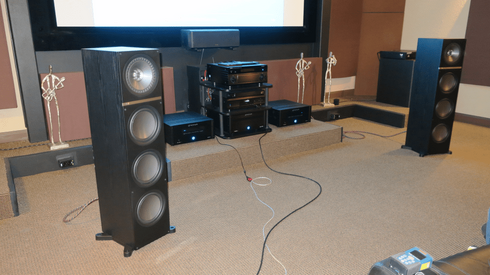
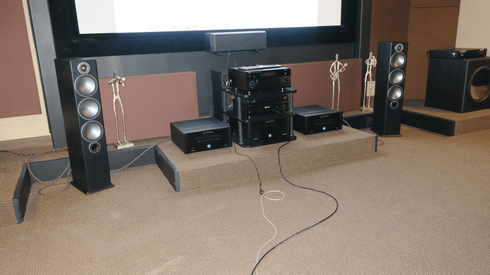
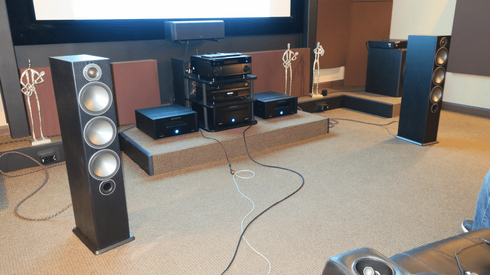
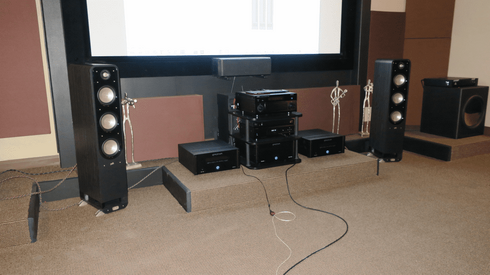
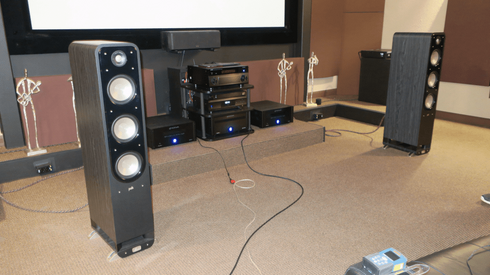
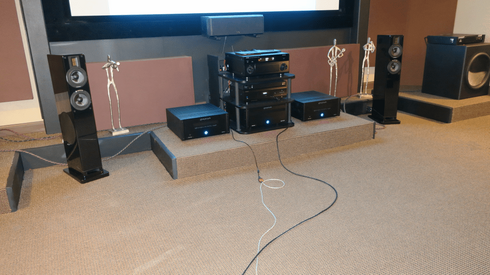
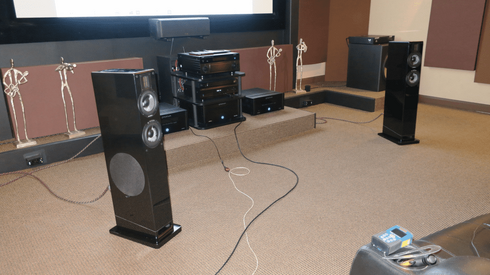
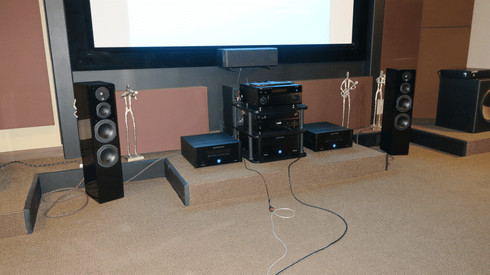
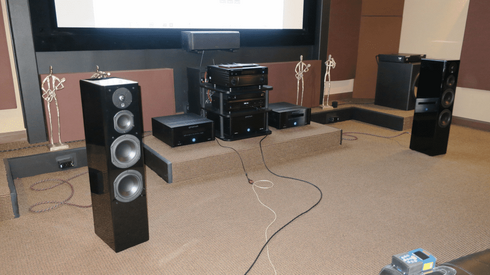
Here is a pic of the listening room with the reference system, including the MartinLogan ESL speakers. Reflective panels will be removed for the evaluation.

Our main goal will be to evaluate each speaker on its own merits, not comparing them to the others, or ranking them. So basically you get ten separate speaker reviews, with comments from three listeners.
We'll have one session with the speakers placed closer to the front wall, approximately 3ft from the front of the speaker to the wall. We'll have one session without Dirac Live and one session with Dirac Live. Next we will move the speakers out into the room, placing them in the approximate location that Cardas Room Setup Guide recommends (as a starting point). We will listen for the best imaging and sound stage placement as we move the speakers around to find that best placement. Once we find the sweet spot for the speakers, we'll each listen without Dirac Live and with Dirac Live... and share our thoughts for each speaker.
Perhaps a bit over-dramatic, but Sonnie, Dennis, and I could not be more excited about the task before us. The speakers are ready to play, formidable Emotiva monoblock amplification is warmed up to drive them, our all-lossless evaluation tracks are queued, and the we are ready to listen!
Hold on to your reclining audio seats, check back often for updates, we are about to begin....
Acronyms
FR = Frequency Response
HF = High Frequency
MF = Mid Frequency
LF = Low Frequency
LP = Listening Position
SS&I = Soundstage and Imaging
SS = Soundstage
IC = Image Clarity, same as Imaging
The Evaluation Environment
Our listening room, Sonnie’s Cedar Creek Cinema, measures 19.5 ft wide, 23.5 ft front to back, and 8.5 ft floor to ceiling (not at the riser), with corner bass traps and absorptive panels at critical first-reflection points, including on the ceiling. There is a small equipment stage with cutouts where speakers can be located close to the wall if desired (virtually never, except to satisfy readers who insist on evaluation or measurements there), and a riser for the second row of seats. The room is fully carpeted. I have listened to speakers in this room for hundreds of hours, Sonnie for many thousands (tens of thousands?), and Dennis, a seasoned evaluator, for easily a hundred or more, so we are all very familiar with the room and its characteristics.
There are seven reclining theater seats, three on the front row and four on a riser behind them. The center seat on the front row is our evaluation seat, the Listening Position (LP). It is unfathomable that anyone would build a theater or listening room with an even number of front-row seats, not allowing for a centered listening position for the main listener, but it happens. While we are evaluating, the listener who is “at bat” sits in the LP with the other front row seats empty so there are no distractions or odd sonic effects from someone’s body. Minimizing variables is always a top priority for us.
Frequent breaks and even optional hearing protection for those not actively evaluating in the LP help us avoid fatigue.
Our main listening seat has a plush blanket custom made into a seat-back reflection absorber to minimize reflections close to the listener’s ears that can disrupt imaging. While not perfect, the technique works very well to eliminate the mid- and high-frequency reflections most detrimental to image clarity and precision.
Speaker Position
Without fail, the best position for any speaker we have worked with has been well into the room, away from the front wall, widely spaced, with some toe-in, but rarely aimed directly at the listener. The only exception to the toe-in guideline is with horn-loaded or waveguides for the HF driver, which tend to sound best pointed at the listener, or even crossed slightly in front of the listener. This position is best for soundstage and imaging (SS&I) with only a small but easily tolerable sacrifice in high frequency response, if any. We have worked with enough speakers in Sonnie’s room that we can usually find this sweet position quickly now, except for an occasional tougher model. During this evaluation, a number of the models were pulled directly to that spot and the result was so good that only minor toe-in adjustment might be needed. Position and angle measurements are always carefully matched for symmetry using a laser distance meter. Setup symmetry is essential for good SS&I. A difference of an inch can shift the center image enough to be very distracting.
As much as we have emphasized speaker position well out from the front wall, we have been asked by readers to briefly listen to each pair of speakers close to the wall, so we have done this to satisfy them and to demonstrate what a difference it usually makes. There has been an occasional surprise in that we have found a model that performs well close to the wall. The fact that most models are not at their best close to the wall should not be held against the manufacturer or or be considered a design deficiency. Soundstage development and image clarity depend on room reflections and ambiance, Tradeoffs that lead to good at-wall performance would have to be traded off in many cases, making regular in-room performance suffer.
Port Plugs, Base Plates, Spikes
The number of variables to deal with during a event like this can be overwhelming if one does not limit them. We decided beforehand to not work with port plugs if supplied, although only the Chane came with them. Base plates were installed, but spikes make a speaker very difficult to move or adjusts, so we elected to leave spikes off. Most models were supplied with them.
Our Measurements
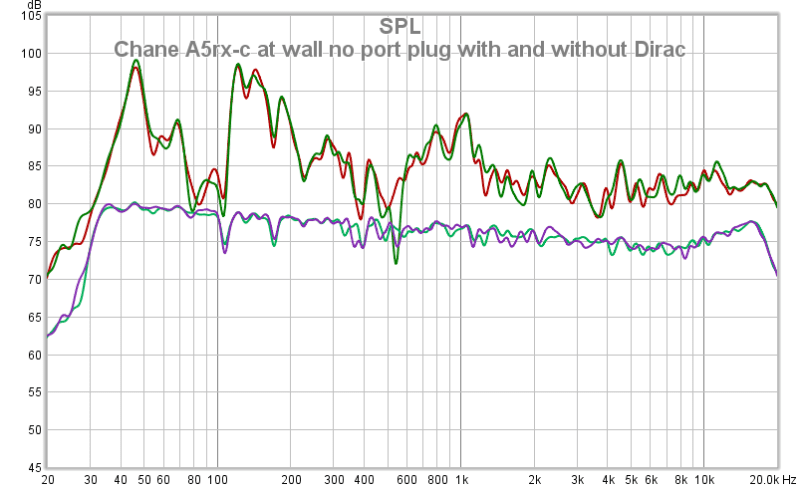
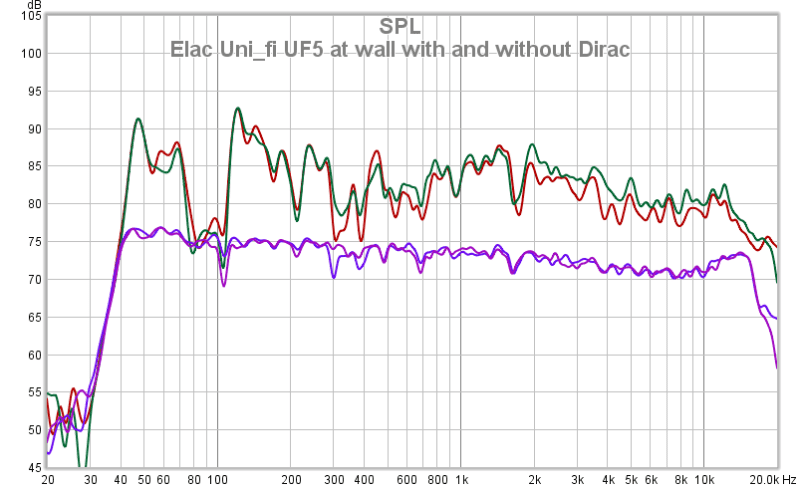
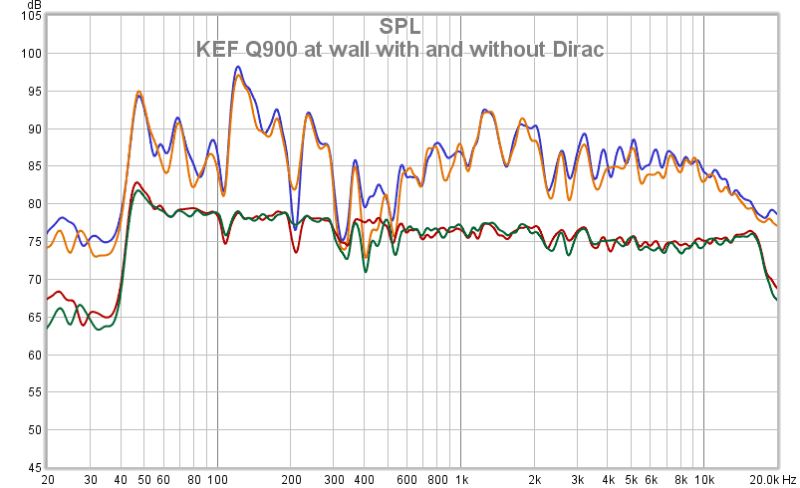
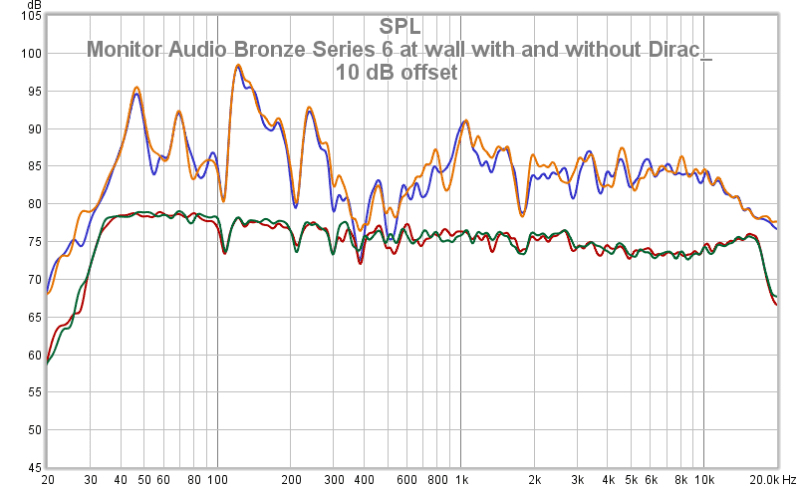
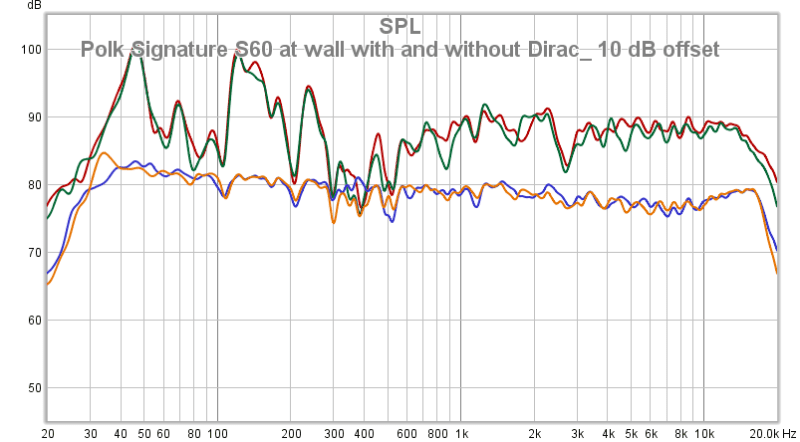
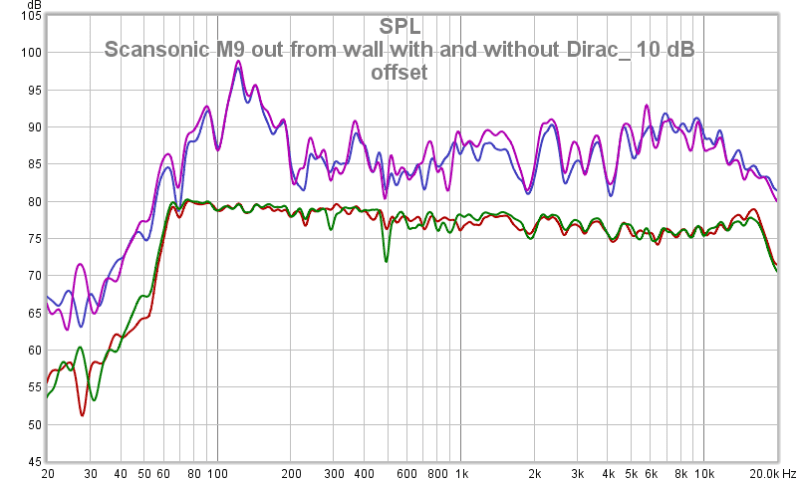
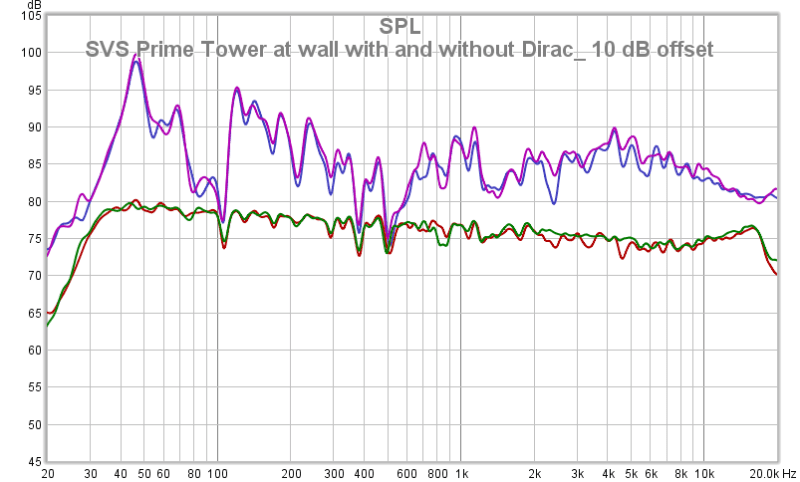
Rooms and speakers work together. Manufacturer’s measurements are taken under ideal conditions, not in real-world rooms. The measurements we have taken and included in this report show the effects of the room on these speakers. We urge the reader to not jump to conclusions because of anomalies in our measurements. The same speakers in another room will surely measure differently.
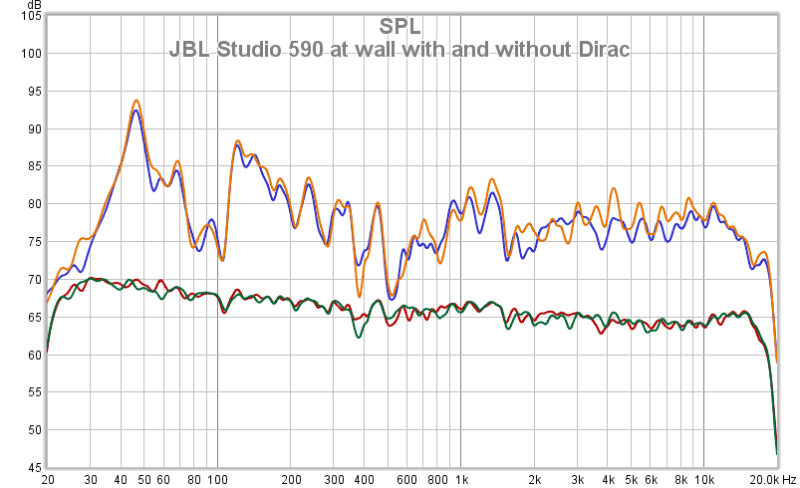
We used 12th-octave smoothing for our measurements. This yields a bit more detail than is normally considered useful, but we lean toward having more detail in our data than is absolutely necessary. This is especially true for speaker setup and for EQ decisions. Before one decides to add another filter to one’s EQ apparatus, one should always dig deeper into the data to be sure he is taking the right course of action. What appears to be a broad dip in the FR with 6th-octave smoothing, perhaps worthy of a little bit of low-Q boost, might actually be a couple of side-by-side narrow notches in the FR, the type of anomaly one should NEVER try to boost. Only by digging a little deeper can one see the underlying detail to make the best decision.
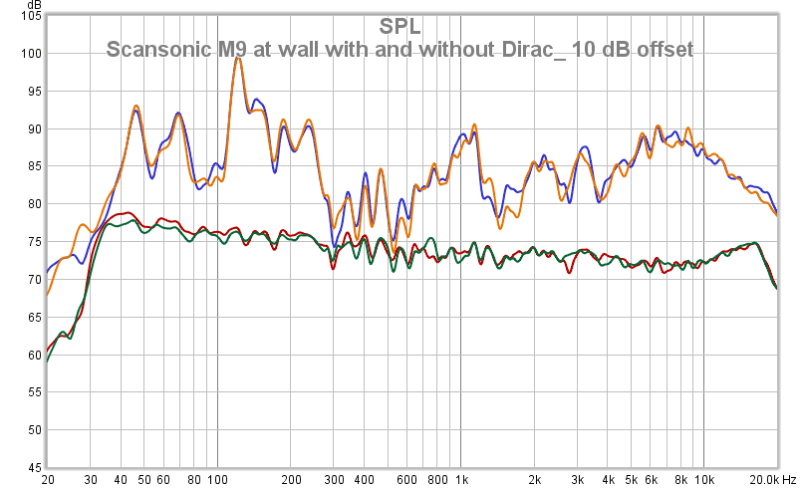
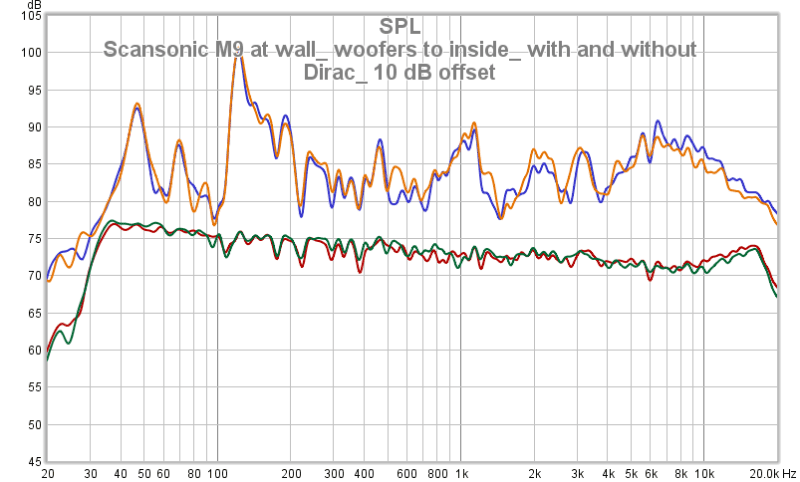
Note that many of our Room EQ Wizard plots have a manually inserted 10 dB offset to separate curves and make them easier to read.
Using Dirac Live
The debates about whether or not to use room EQ will go on forever, and can be discussed in detail elsewhere. We have found it to be beneficial, with little or no downside when applied intelligently. And Dirac Live, with its mixed-mode filter strategy and proprietary processing, making use of minimum phase and FIR filters where each works best, and with imaging and avoidance of negative effects, has given us excellent results.
We always found the best speaker position we could, giving SS&I the main priority, and used Dirac Live to flatten frequency response. A final polishing of image clarity always results, and in many cases the soundstage was also expanded and spread more evenly across the front of the room.
For this event, we quickly ran a Dirac Live calibration with a single mic position. My own experience has been consistent with instructions given by Dirac Research, that a number of calibration mic positions is beneficial, starting at the center of the sweet spot and, for single-seat optimization, using a small random spread of position around the listener’s head area. But for our event this would have taken far too long, and we have found the single mic position calibration to work very well. FR measurements were taken with and without, both at the wall and out from the wall at the final listening location.
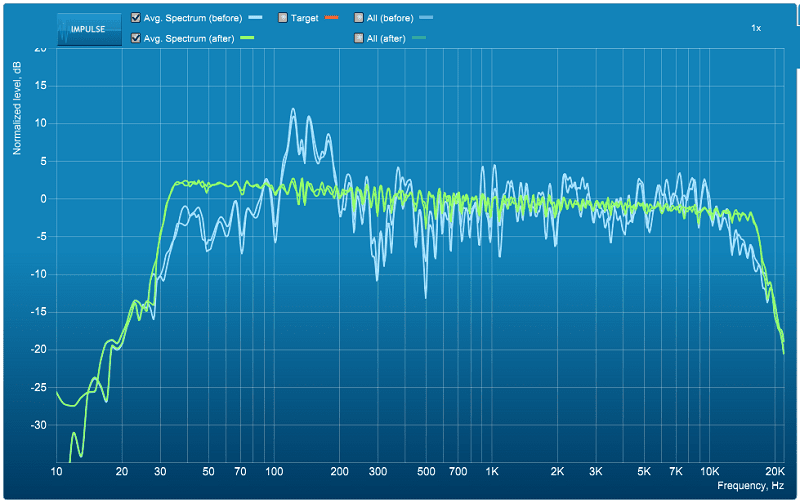
Dirac Live reveals mountains of detail in many recordings. Flattening FR can uncover sounds that are being masked in the frequency domain. Reducing the amplitude of resonant peaks helps tame ringing that can obscure detail in the time domain. And cleaning up the soundstage can reveal small sounds between other bigger ones in the psycho-acoustical processing of the spatial domain. Our advice concerning Dirac Live: Don’t leave home without it!
Target Curve Variations
We always started with Dirac Live’s default target curve. One variation that we found necessary to implement a couple of times was to shift the LF (high-pass knee) end of that curve and to shift the LF “end of processing” point on the Filter Design page of the Dirac Live application associated with the miniDSP DDRC88-BM. Not doing this had the lowest frequencies being amplified enough that LF driver distortion resulted. These changes involved a few mouse clicks and were quite painless, giving marked improvement where applied.
Evaluation Process
We knew that getting through ten pairs of speakers in three days would only be possible if we stuck with an efficient process. Here is how we approached the task:
Tracks and Playback
All tracks were in lossless FLAC or WAV format, accessed from a USB memory device plugged into the OPPO player using the built-in navigation menus and a programmed remote.
Setup Tracks
Periodic pink noise, mono mix
Sharp image clarity. All frequencies are tightly centered through the spectrum, the image is a sharp vertical line, usually very short, with zero width. No parts of the spectrum should seem fat (fatter than a golf ball) or undulate or smear or move. The overall sound should be sharply mono, as though coming from a single center-channel speaker. and never have any stereo qualities.
B-52’s, Revolution Earth, mono mix
Sharp image clarity. In this case, one has individual voices and instruments to listen for, rather than the whole audio spectrum at once. As each appears in its turn, one can focus on that particular part of the spectrum and listen for images that seem fat (fatter than a golf ball) or undulate or smear or move on different notes. The overall sound should be sharply mono, like a center channel speaker, and never have any stereo qualities.
B-52’s, The World’s Green Laughter, original stereo mix
There are many small rhythm instrument sounds and vocalizations distributed through the soundstage, and each should own its own space with the impression of darkness around it. There should be no smearing on sibilants, no pulling or expanding, no notes or sequences that wander in the soundstage, although each sound is pretty much from a separate instrument on this track. Each should be stable, and tightly focused. The big floor tom should be focused and punchy despite its low fundamental frequency.
Wayne’s Evaluation Tracks
Radiohead - “Packt Like Sardines In a Crushed Tin Box” - nickname “Sardines”
The opening kick drum sound should be focused and punchy, tightly centralized despite its low-frequency fundamental. It should ring very little and sound well-damped, although there is a finite decay time in the recording. The lead vocal and bass notes on the electric piano should not receive only minimal emphasis from bass peaks due to room modes, and should remain clear, never muddy. The soundstage should be very wide, with most images originating from outside the width of the speakers.
Midlake - “Roscoe” - nickname “Roscoe”
Voices and guitars on the chorus should be equally spaced across the soundstage with tight image clarity and the spaces between them should be clear and empty, not mushed together or overlapping. I visualize the tines of a comb and the empty gaps between them.
deadmau5 - “I Remember (Vocal Mix - from Random Album Title)" - nickname “Remember”
The huge reverberant space of this track should be evenly spread across the width of the soundstage. The kick drum should be strong and go deep and should be tightly centered and focused. It should be quickly damped out with no ringing.
Rachmaninoff - “Variations on a Theme of Corelli, Op. 42” - nickname “Variations"
This recording was made on an Overs piano, which has a very even tone across the keyboard and throughout its wide dynamic range. There should be a hint of a “tinkle” on each note. A speaker should be able to handle the dynamics of the fortississimo passages with plenty of volume with no sign of distortion or breakup.
B-52’s - “Ain’t it a Shame” - nickname “Shame”
Harmonica notes during the intro should all be centered. This is difficult to accomplish for most speakers, because each note has only a few distinct harmonics and they are widely spaced in the upper audio spectrum. They should not wander at all, but usually do, with each note coming from a different position in the soundstage. Only on an expensive high-end electrostatic have I ever heard them rock solid with no movement. The HF sheen on Cindy’s voice should be centered on the rest of the vocal sound and should exhibit no smearing or spreading. Vocal echoes should appear well-formed and almost solid, like instruments in their own right. The most telltale echo is after the word “and” at 1;17, which should appear high and way to the right, should be strong, about the size of a basketball, almost seeming to have a solid outline.
Dennis's Evaluation Tracks
The songs I used for auditioning were picked for several reasons. Joshua Bell: Chopin's Nocturne in C Sharp Minor is a great capture of acoustic instruments and gives a sense of performers in realistic proportions on a stage, good for SS&I. Deadmau5: Ice Age (Deadmau5 Remix) features beautiful female vocals, explores the frequency extremes and the incidental digital effects have enormous scope, giving the sense of an extremely large concert performance. AC/DC: TNT is a rough, raw recording, with clear left/right pans of the guitars and piercing, high frequency Bon Scott vocals that push midrange and tweeter limits.
Sonnie's Evaluation Tracks
Awolnation – Sail: This song has a fairly nasty bass note between 40-50Hz that hits hard and will test what I expect to be the minimum of what I’d like to hear a tower speaker be able to handle relatively easy at louder volumes.
Cassandra Wilson – Strange Fruit: A favorite song of mine for sound stage, imaging and depth acuity. Do the speakers disappear and the location of the instruments become identifiable, such as the trumpet player being on the far back left of the stage and just left of the Cassandra, who is just ever so slightly left of center stage. Is the big bass to the right of her and front of stage.
Trilok Gurtu – Goose Bumps: With the right speakers and proper placement, this song has a super wide sound stage, stretching the width of the room and out to the side of the listener.
Jay McShann – My Funny Valentine: A saxophone and piano masterpiece… and a great demo song to show off the qualities of those instruments.
Yello – La Habanero: This song has all kinds of sounds to test speakers… but my favorite is the mid-bass that kicks in at about 2:10 of the song.
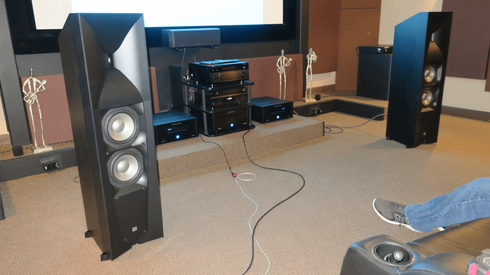
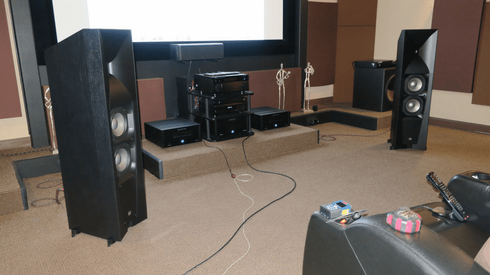
Setup At The Wall
These dimensions apply for all the models we evaluated when set close to the front wall of the room.
134 to ear
120 c to c
36 to fr wall
51 to side wall
32 degrees toe-in
As you can see, the Klipsch suffered a good bit of damage in shipping.
The Speakers (Alphabetical Order)
Chane A5rx-c ($860 for the upcoming A5.4 Gen3)
ELAC Uni-fi UF5 ($1000)
Emotiva T1 ($750)
JBL Studio 590 ($950)
KEF Q900 ($1200)
Klipsch RP-280F ($1080) *Eliminated due to bad tweeter - likely damaged in shipping.
Monitor Audio Bronze Series 6 ($1100)
Polk Signature S60 ($900)
Scansonic M9 ($1200)
SVS Prime Tower ($1000)
Equipment
Yamaha CX-A5100 Processor (Pure Direct Mode)
Emotiva XPA-1 Gen2 Class A/AB Monoblock Power Amps
OPPO UDP-205 (USB Input)
miniDSP DDRC-88 (Dirac Live - Testing with and without)
Canare 4S11 Speaker Cables
Epson Pro Cinema 4040 Projector / Elite Screen
Here is a pic of the listening room with the reference system, including the MartinLogan ESL speakers. Reflective panels will be removed for the evaluation.
Our main goal will be to evaluate each speaker on its own merits, not comparing them to the others, or ranking them. So basically you get ten separate speaker reviews, with comments from three listeners.
We'll have one session with the speakers placed closer to the front wall, approximately 3ft from the front of the speaker to the wall. We'll have one session without Dirac Live and one session with Dirac Live. Next we will move the speakers out into the room, placing them in the approximate location that Cardas Room Setup Guide recommends (as a starting point). We will listen for the best imaging and sound stage placement as we move the speakers around to find that best placement. Once we find the sweet spot for the speakers, we'll each listen without Dirac Live and with Dirac Live... and share our thoughts for each speaker.
Perhaps a bit over-dramatic, but Sonnie, Dennis, and I could not be more excited about the task before us. The speakers are ready to play, formidable Emotiva monoblock amplification is warmed up to drive them, our all-lossless evaluation tracks are queued, and the we are ready to listen!
Hold on to your reclining audio seats, check back often for updates, we are about to begin....
Acronyms
FR = Frequency Response
HF = High Frequency
MF = Mid Frequency
LF = Low Frequency
LP = Listening Position
SS&I = Soundstage and Imaging
SS = Soundstage
IC = Image Clarity, same as Imaging
The Evaluation Environment
Our listening room, Sonnie’s Cedar Creek Cinema, measures 19.5 ft wide, 23.5 ft front to back, and 8.5 ft floor to ceiling (not at the riser), with corner bass traps and absorptive panels at critical first-reflection points, including on the ceiling. There is a small equipment stage with cutouts where speakers can be located close to the wall if desired (virtually never, except to satisfy readers who insist on evaluation or measurements there), and a riser for the second row of seats. The room is fully carpeted. I have listened to speakers in this room for hundreds of hours, Sonnie for many thousands (tens of thousands?), and Dennis, a seasoned evaluator, for easily a hundred or more, so we are all very familiar with the room and its characteristics.
There are seven reclining theater seats, three on the front row and four on a riser behind them. The center seat on the front row is our evaluation seat, the Listening Position (LP). It is unfathomable that anyone would build a theater or listening room with an even number of front-row seats, not allowing for a centered listening position for the main listener, but it happens. While we are evaluating, the listener who is “at bat” sits in the LP with the other front row seats empty so there are no distractions or odd sonic effects from someone’s body. Minimizing variables is always a top priority for us.
Frequent breaks and even optional hearing protection for those not actively evaluating in the LP help us avoid fatigue.
Our main listening seat has a plush blanket custom made into a seat-back reflection absorber to minimize reflections close to the listener’s ears that can disrupt imaging. While not perfect, the technique works very well to eliminate the mid- and high-frequency reflections most detrimental to image clarity and precision.
Speaker Position
Without fail, the best position for any speaker we have worked with has been well into the room, away from the front wall, widely spaced, with some toe-in, but rarely aimed directly at the listener. The only exception to the toe-in guideline is with horn-loaded or waveguides for the HF driver, which tend to sound best pointed at the listener, or even crossed slightly in front of the listener. This position is best for soundstage and imaging (SS&I) with only a small but easily tolerable sacrifice in high frequency response, if any. We have worked with enough speakers in Sonnie’s room that we can usually find this sweet position quickly now, except for an occasional tougher model. During this evaluation, a number of the models were pulled directly to that spot and the result was so good that only minor toe-in adjustment might be needed. Position and angle measurements are always carefully matched for symmetry using a laser distance meter. Setup symmetry is essential for good SS&I. A difference of an inch can shift the center image enough to be very distracting.
As much as we have emphasized speaker position well out from the front wall, we have been asked by readers to briefly listen to each pair of speakers close to the wall, so we have done this to satisfy them and to demonstrate what a difference it usually makes. There has been an occasional surprise in that we have found a model that performs well close to the wall. The fact that most models are not at their best close to the wall should not be held against the manufacturer or or be considered a design deficiency. Soundstage development and image clarity depend on room reflections and ambiance, Tradeoffs that lead to good at-wall performance would have to be traded off in many cases, making regular in-room performance suffer.
Port Plugs, Base Plates, Spikes
The number of variables to deal with during a event like this can be overwhelming if one does not limit them. We decided beforehand to not work with port plugs if supplied, although only the Chane came with them. Base plates were installed, but spikes make a speaker very difficult to move or adjusts, so we elected to leave spikes off. Most models were supplied with them.
Our Measurements
Rooms and speakers work together. Manufacturer’s measurements are taken under ideal conditions, not in real-world rooms. The measurements we have taken and included in this report show the effects of the room on these speakers. We urge the reader to not jump to conclusions because of anomalies in our measurements. The same speakers in another room will surely measure differently.
We used 12th-octave smoothing for our measurements. This yields a bit more detail than is normally considered useful, but we lean toward having more detail in our data than is absolutely necessary. This is especially true for speaker setup and for EQ decisions. Before one decides to add another filter to one’s EQ apparatus, one should always dig deeper into the data to be sure he is taking the right course of action. What appears to be a broad dip in the FR with 6th-octave smoothing, perhaps worthy of a little bit of low-Q boost, might actually be a couple of side-by-side narrow notches in the FR, the type of anomaly one should NEVER try to boost. Only by digging a little deeper can one see the underlying detail to make the best decision.
Note that many of our Room EQ Wizard plots have a manually inserted 10 dB offset to separate curves and make them easier to read.
Using Dirac Live
The debates about whether or not to use room EQ will go on forever, and can be discussed in detail elsewhere. We have found it to be beneficial, with little or no downside when applied intelligently. And Dirac Live, with its mixed-mode filter strategy and proprietary processing, making use of minimum phase and FIR filters where each works best, and with imaging and avoidance of negative effects, has given us excellent results.
We always found the best speaker position we could, giving SS&I the main priority, and used Dirac Live to flatten frequency response. A final polishing of image clarity always results, and in many cases the soundstage was also expanded and spread more evenly across the front of the room.
For this event, we quickly ran a Dirac Live calibration with a single mic position. My own experience has been consistent with instructions given by Dirac Research, that a number of calibration mic positions is beneficial, starting at the center of the sweet spot and, for single-seat optimization, using a small random spread of position around the listener’s head area. But for our event this would have taken far too long, and we have found the single mic position calibration to work very well. FR measurements were taken with and without, both at the wall and out from the wall at the final listening location.
Dirac Live reveals mountains of detail in many recordings. Flattening FR can uncover sounds that are being masked in the frequency domain. Reducing the amplitude of resonant peaks helps tame ringing that can obscure detail in the time domain. And cleaning up the soundstage can reveal small sounds between other bigger ones in the psycho-acoustical processing of the spatial domain. Our advice concerning Dirac Live: Don’t leave home without it!
Target Curve Variations
We always started with Dirac Live’s default target curve. One variation that we found necessary to implement a couple of times was to shift the LF (high-pass knee) end of that curve and to shift the LF “end of processing” point on the Filter Design page of the Dirac Live application associated with the miniDSP DDRC88-BM. Not doing this had the lowest frequencies being amplified enough that LF driver distortion resulted. These changes involved a few mouse clicks and were quite painless, giving marked improvement where applied.
Evaluation Process
We knew that getting through ten pairs of speakers in three days would only be possible if we stuck with an efficient process. Here is how we approached the task:
- Bring one set of speakers into the room. We went in alphabetical order by manufacturer.
- Set up at the wall.
- Run Dirac Live calibration.
- Measure frequency response (FR) with and without Dirac Live.
- Each evaluator listen without Dirac, then with Dirac;
- Move out from the wall and find the best position for that model. Many of the speakers ended up at the same location and angle.
- Run Dirac Live calibration.
- Measure frequency response (FR) with and without Dirac Live.
- Each evaluator listens without Dirac, then with Dirac.
Tracks and Playback
All tracks were in lossless FLAC or WAV format, accessed from a USB memory device plugged into the OPPO player using the built-in navigation menus and a programmed remote.
Setup Tracks
Periodic pink noise, mono mix
Sharp image clarity. All frequencies are tightly centered through the spectrum, the image is a sharp vertical line, usually very short, with zero width. No parts of the spectrum should seem fat (fatter than a golf ball) or undulate or smear or move. The overall sound should be sharply mono, as though coming from a single center-channel speaker. and never have any stereo qualities.
B-52’s, Revolution Earth, mono mix
Sharp image clarity. In this case, one has individual voices and instruments to listen for, rather than the whole audio spectrum at once. As each appears in its turn, one can focus on that particular part of the spectrum and listen for images that seem fat (fatter than a golf ball) or undulate or smear or move on different notes. The overall sound should be sharply mono, like a center channel speaker, and never have any stereo qualities.
B-52’s, The World’s Green Laughter, original stereo mix
There are many small rhythm instrument sounds and vocalizations distributed through the soundstage, and each should own its own space with the impression of darkness around it. There should be no smearing on sibilants, no pulling or expanding, no notes or sequences that wander in the soundstage, although each sound is pretty much from a separate instrument on this track. Each should be stable, and tightly focused. The big floor tom should be focused and punchy despite its low fundamental frequency.
Wayne’s Evaluation Tracks
Radiohead - “Packt Like Sardines In a Crushed Tin Box” - nickname “Sardines”
The opening kick drum sound should be focused and punchy, tightly centralized despite its low-frequency fundamental. It should ring very little and sound well-damped, although there is a finite decay time in the recording. The lead vocal and bass notes on the electric piano should not receive only minimal emphasis from bass peaks due to room modes, and should remain clear, never muddy. The soundstage should be very wide, with most images originating from outside the width of the speakers.
Midlake - “Roscoe” - nickname “Roscoe”
Voices and guitars on the chorus should be equally spaced across the soundstage with tight image clarity and the spaces between them should be clear and empty, not mushed together or overlapping. I visualize the tines of a comb and the empty gaps between them.
deadmau5 - “I Remember (Vocal Mix - from Random Album Title)" - nickname “Remember”
The huge reverberant space of this track should be evenly spread across the width of the soundstage. The kick drum should be strong and go deep and should be tightly centered and focused. It should be quickly damped out with no ringing.
Rachmaninoff - “Variations on a Theme of Corelli, Op. 42” - nickname “Variations"
This recording was made on an Overs piano, which has a very even tone across the keyboard and throughout its wide dynamic range. There should be a hint of a “tinkle” on each note. A speaker should be able to handle the dynamics of the fortississimo passages with plenty of volume with no sign of distortion or breakup.
B-52’s - “Ain’t it a Shame” - nickname “Shame”
Harmonica notes during the intro should all be centered. This is difficult to accomplish for most speakers, because each note has only a few distinct harmonics and they are widely spaced in the upper audio spectrum. They should not wander at all, but usually do, with each note coming from a different position in the soundstage. Only on an expensive high-end electrostatic have I ever heard them rock solid with no movement. The HF sheen on Cindy’s voice should be centered on the rest of the vocal sound and should exhibit no smearing or spreading. Vocal echoes should appear well-formed and almost solid, like instruments in their own right. The most telltale echo is after the word “and” at 1;17, which should appear high and way to the right, should be strong, about the size of a basketball, almost seeming to have a solid outline.
Dennis's Evaluation Tracks
The songs I used for auditioning were picked for several reasons. Joshua Bell: Chopin's Nocturne in C Sharp Minor is a great capture of acoustic instruments and gives a sense of performers in realistic proportions on a stage, good for SS&I. Deadmau5: Ice Age (Deadmau5 Remix) features beautiful female vocals, explores the frequency extremes and the incidental digital effects have enormous scope, giving the sense of an extremely large concert performance. AC/DC: TNT is a rough, raw recording, with clear left/right pans of the guitars and piercing, high frequency Bon Scott vocals that push midrange and tweeter limits.
Sonnie's Evaluation Tracks
Awolnation – Sail: This song has a fairly nasty bass note between 40-50Hz that hits hard and will test what I expect to be the minimum of what I’d like to hear a tower speaker be able to handle relatively easy at louder volumes.
Cassandra Wilson – Strange Fruit: A favorite song of mine for sound stage, imaging and depth acuity. Do the speakers disappear and the location of the instruments become identifiable, such as the trumpet player being on the far back left of the stage and just left of the Cassandra, who is just ever so slightly left of center stage. Is the big bass to the right of her and front of stage.
Trilok Gurtu – Goose Bumps: With the right speakers and proper placement, this song has a super wide sound stage, stretching the width of the room and out to the side of the listener.
Jay McShann – My Funny Valentine: A saxophone and piano masterpiece… and a great demo song to show off the qualities of those instruments.
Yello – La Habanero: This song has all kinds of sounds to test speakers… but my favorite is the mid-bass that kicks in at about 2:10 of the song.
Setup At The Wall
These dimensions apply for all the models we evaluated when set close to the front wall of the room.
134 to ear
120 c to c
36 to fr wall
51 to side wall
32 degrees toe-in
Last edited:


