DIY Consoles!

Todd Anderson

Editor / Senior Admin
Staff member
Thread Starter
Joined
Jan 20, 2017
Messages
9,264
Location
Balt/Wash Metro
More  
Preamp, Processor or Receiver
StormAudio ISP.24 MK2
Main Amp
Emotiva XPA-5
Additional Amp
Emotiva XPA Gen3 2.8 multichannel amp
Other Amp
Denon X8500H
Computer Audio
AudioEngine A2+
DAC
THX ONYX
Universal / Blu-ray / CD Player
Kaleidescape TERRA, OPPO UDP-203, Panasonic UB9000
Front Speakers
GoldenEar Technology Triton One.R
Center Channel Speaker
GoldenEar Technology SuperCenter Reference
Surround Speakers
SVS Ultra Surround
Surround Back Speakers
SVS Ultra Bookshelf
Front Height Speakers
SVS Prime Elevation x4 (Top Front, Top Mid-Front)
Rear Height Speakers
SVS Prime Elevation x4 (Top Middle, Top Rear)
Subwoofers
dual SVS SB16s + dual PSA XS30s
Other Speakers or Equipment
Behringer 1124p; Aura Bass Shaker Pros; SuperSub X
Video Display Device
JVC NX7
Screen
Seymour Screen Excellence, Enlightor NEO AT Screen
Streaming Equipment
iFi Audio Zen Blue
Streaming Subscriptions
Qobuz, TIDAL, Spotify, ROON
Other Equipment
LG Electronics 65-inch B6 OLED, Sony 65-inch X900F, ZeroSurge 8R15W x 2, ZeroSurge 2R15W x 2
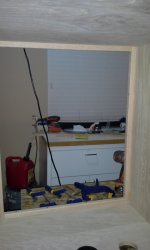
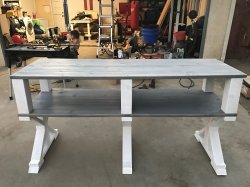
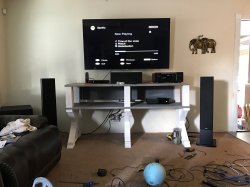
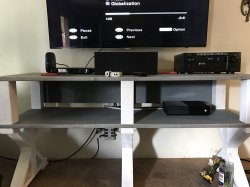
Have you built a unique console to house your gear?

Share it here!
 

climber07

Member
Joined
Jul 23, 2017
Messages
69
I'll start with a pic of the completed media console. I will post a bunch of pics and descriptions of the build process in later posts.

20151130_232001.jpg
 
Last edited:

tripplej

AV Addict
Joined
Jul 13, 2017
Messages
6,882
More  
Preamp, Processor or Receiver
NAD T-777
Universal / Blu-ray / CD Player
Oppo 103 Blu Ray Player
Front Speakers
7 Paradigm Reference series 8" in ceiling speakers
Subwoofers
2 Paradigm SE Subs
Other Speakers or Equipment
Nintendo Wii U Gaming Console
Video Display Device
Samsung UN75F8000 LED TV
Remote Control
Universal Remote MX-450
Streaming Subscriptions
Sony PS4 Gaming Console, Panamax MR-5100 Surge
very nice build.. Very organized.
 

Todd Anderson

Editor / Senior Admin
Staff member
Thread Starter
Joined
Jan 20, 2017
Messages
9,264
Location
Balt/Wash Metro
More  
Preamp, Processor or Receiver
StormAudio ISP.24 MK2
Main Amp
Emotiva XPA-5
Additional Amp
Emotiva XPA Gen3 2.8 multichannel amp
Other Amp
Denon X8500H
Computer Audio
AudioEngine A2+
DAC
THX ONYX
Universal / Blu-ray / CD Player
Kaleidescape TERRA, OPPO UDP-203, Panasonic UB9000
Front Speakers
GoldenEar Technology Triton One.R
Center Channel Speaker
GoldenEar Technology SuperCenter Reference
Surround Speakers
SVS Ultra Surround
Surround Back Speakers
SVS Ultra Bookshelf
Front Height Speakers
SVS Prime Elevation x4 (Top Front, Top Mid-Front)
Rear Height Speakers
SVS Prime Elevation x4 (Top Middle, Top Rear)
Subwoofers
dual SVS SB16s + dual PSA XS30s
Other Speakers or Equipment
Behringer 1124p; Aura Bass Shaker Pros; SuperSub X
Video Display Device
JVC NX7
Screen
Seymour Screen Excellence, Enlightor NEO AT Screen
Streaming Equipment
iFi Audio Zen Blue
Streaming Subscriptions
Qobuz, TIDAL, Spotify, ROON
Other Equipment
LG Electronics 65-inch B6 OLED, Sony 65-inch X900F, ZeroSurge 8R15W x 2, ZeroSurge 2R15W x 2
Climber, that build is top notch! I'm curious to know what kind of equipment you have to pull that off!
 

climber07

Member
Joined
Jul 23, 2017
Messages
69
Climber, that build is top notch! I'm curious to know what kind of equipment you have to pull that off!

I looked for years for a media console with over 22 inches of depth for equipment and cables. I also needed shelves that would support up to 100 lb. amps and such. With practically nothing on the market of that size and strength, I set out on a quest to design and build my own.

The first step in the process was the design phase. For that I started using MS PowerPoint. That wasn't the ideal solution so I searched for another. I happened upon Sketchup. A 3D modeling tool that is extremely user friendly. After an initial period of familiarization, I began designing the console. With Sketchup, I was able to build a 3D model that could be manipulated, exploded, measured, and scaled. I highly recommend it for designing as it is free.

Media Console 11.PNG Media Console 9.PNG Media Console 8.PNG Media Console 12.PNG Media Console 5.PNG Media Console 3.PNG Media Console 2.PNG Media Console Wire Frame Measurements 2.JPG exploded view.JPG exploded view wireframe.JPG Media Console Wire Frame Measurements 4.JPG Media Console Wire Frame Measurements 3.JPG
 
Last edited:

climber07

Member
Joined
Jul 23, 2017
Messages
69
After many months of designing, redesigning, modifying, and contemplating build challenges, I began to price and source the tools I would need to build such a large project. Initially, I had only a few hand tools such as hammers, wrenches, and screwdrivers. No power tools or woodworking equipment. The initial impetus for the tool purchase came when I promised my wife I would build her a walk-in closet system. The tools I bought to assist me were my present from her. Here's her closet I build with the help of my father, who flew out to Cali with my mother for a visit. What better than a project for father and son.

981438_666918736657931_1401810192_o.jpg DSC05152.JPG DSC05153.JPG DSC05154.JPG DSC05155.JPG DSC05156.JPG

Most of the tools I purchased were from Home Depot and Lowe's. I bought mostly Rigid brand power tools due to their lifetime warranty. Here are some of the tools I purchased.

20140825_122927.jpg 20140816_190527.jpg 20140816_190206.jpg 20140816_190155.jpg 20140816_190116.jpg

As you can see, I had to also build my own sturdy work table. 2x4s and OSB make for a super sturdy working platform. Can be easily disassembled if necessary.

14 - 1.jpg
 
Last edited:

climber07

Member
Joined
Jul 23, 2017
Messages
69
The first step was to build the "carpet sliders" right into the design itself while ensuring that the support for the console could withstand hundreds of pounds of equipment. For this I glued and clamped oak boards to build the sliders.

20140825_115607.jpg 20140825_120124.jpg 20140825_121312.jpg

After the glue cured, I was able to use a router to round the edges of the sliders.

20140826_202745.jpg

After I made the sliders, I started practicing with the shelf peg jig and the pocket screw jig. Pocket screws rule!

20140831_101437.jpg 20140831_100102.jpg

As you can see, I used a ton of screws to ensure there would be no warping or sagging. This is the center shelf for the center speaker.

20140831_103320.jpg

Then I practiced cutting 2" holes for the shelf vents and used soffit vent covers for the holes. Although the front and sides of the media console support are solid, I left the back of the support open to allow for airflow under the back of the console and up through the bottom shelf. This will allow airflow up through any components I have on the shelves.

20140908_171701.jpg

Here's a sneak peak at the bottom of the console. You can see the back of the console support is open.

20140916_111343.jpg

Here are some random intermediate build shots of drilling holes, cutting, sanding, and practice staining.

20140912_112038.jpg 20140912_104508.jpg 20140912_103706.jpg 20140912_103633.jpg 20140912_103514.jpg 20140912_103421.jpg 20140912_103413.jpg 20140912_103242.jpg 20140912_103227.jpg 20140910_150608.jpg 20140910_150506.jpg 20140910_150443.jpg 20140910_150420.jpg 20140910_150415.jpg 20140910_150341.jpg
 
Last edited:

climber07

Member
Joined
Jul 23, 2017
Messages
69
So after all of the measuring, pocket screw drilling, and hole cutting, the assembly begins.

Oh, did I mention that the circular saw that I purchased originally had a base that was not square. That made it impossible to rip the plywood with a guide. I had to buy a worm gear circular saw that was three times the price. Great saw though. Cuts through just about anything. Very powerful.

20140901_174652.jpg

There aren't any pictures of the intermediate build process. It was nearly 110 degrees outside and I was working 14 hours a day on this thing. Here you can see the face trim. Every piece of plywood has a piece of solid oak trim glued to it to finish the edges (Except for the rear).

20140918_153240.jpg 20140918_153105.jpg 20140918_153055.jpg 20140918_153018.jpg 20140918_145040.jpg 20140918_145028.jpg


Here is a good view of the runners or sliders.

20140916_125714.jpg 20140916_125650.jpg

Edges routed and sanded smooth.
20140915_120822.jpg 20140915_120402.jpg 20140915_120343.jpg 20140915_120334.jpg

Oak trim that will be used to secure the back panels.

20140914_195255.jpg 20140914_195145.jpg 20140914_103253.jpg 20140914_094224.jpg 20140913_183915.jpg 20140913_084817.jpg 20140912_153047.jpg 20140912_153027.jpg

Working is tight spaces requires specialist tools.

20140912_154455.jpg
 

Attachments

  • 20140914_195145.jpg
    20140914_195145.jpg
    370.8 KB · Views: 27
Last edited:

climber07

Member
Joined
Jul 23, 2017
Messages
69
The final steps were to sand all of the surfaces and stain the entire console from top to bottom. If you look closely at the first pic, you'll notice that there are no visible pocket screw holes. They have been filled with oak plugs, glued, and sanded smooth.

20140921_143100.jpg

Ebony stain was used. Oak is a very difficult wood to stain. Especially in 110 degree heat. Lots of elbow grease was required and it took three days to properly stain. Two days to apply all of the poly. Water based poly was used for it's hardness.

20140923_120331.jpg 20140926_112846.jpg 20140926_112900.jpg 20140926_112906.jpg 20140926_113021.jpg 20140926_113104.jpg 20140927_111433.jpg 20140927_111445.jpg 20140929_095237.jpg 20140929_084719.jpg 20140928_145843.jpg 20140927_111455.jpg 20140926_112956.jpg


Drawers faced with solid oak boards and installed with soft close drawer slides.

20140926_113007.jpg 20140926_112956.jpg 20140924_102316.jpg 20140923_163135.jpg

Once everything dried for a couple days. I moved put the rear panels on and moved the monster upstairs. YES THE SAME STAIRS THE S7201 SUBWOOFER WENT UP!!!

I also installed cooling fans from Coolerguys.com I used two of the Cabcool 1202 with LED Thermal Controller

20140929_171524.jpg 20140929_171500 - Copy (2).jpg 20140929_115058.jpg 20140929_112506.jpg 20140929_112501.jpg 20140929_111306.jpg 20140929_210409.jpg

The back of the console has room to mount power strips, component power supplies, and surge protectors.
 
Last edited:

tripplej

AV Addict
Joined
Jul 13, 2017
Messages
6,882
More  
Preamp, Processor or Receiver
NAD T-777
Universal / Blu-ray / CD Player
Oppo 103 Blu Ray Player
Front Speakers
7 Paradigm Reference series 8" in ceiling speakers
Subwoofers
2 Paradigm SE Subs
Other Speakers or Equipment
Nintendo Wii U Gaming Console
Video Display Device
Samsung UN75F8000 LED TV
Remote Control
Universal Remote MX-450
Streaming Subscriptions
Sony PS4 Gaming Console, Panamax MR-5100 Surge
Wow. Very nice.. Love it! Great job! Thanks for sharing the pictures.
 

climber07

Member
Joined
Jul 23, 2017
Messages
69
The real meat and potatoes are still to come. I wanted to pace myself and not flood the thread with too much at once.
 

tripplej

AV Addict
Joined
Jul 13, 2017
Messages
6,882
More  
Preamp, Processor or Receiver
NAD T-777
Universal / Blu-ray / CD Player
Oppo 103 Blu Ray Player
Front Speakers
7 Paradigm Reference series 8" in ceiling speakers
Subwoofers
2 Paradigm SE Subs
Other Speakers or Equipment
Nintendo Wii U Gaming Console
Video Display Device
Samsung UN75F8000 LED TV
Remote Control
Universal Remote MX-450
Streaming Subscriptions
Sony PS4 Gaming Console, Panamax MR-5100 Surge
Cool. Awaiting the pictures. I especially liked the diagrams, etc. (architectural looks).
 

GFOviedo

Member
Joined
Jun 20, 2017
Messages
636
Pretty nice build. You went kind of crazy with the pocket screws I see. I bought that same Ridgit table saw, and I returned it 30 min into taking it out of the box. The cast iron table was warped. The Home Depot manager let me check a few others before buying to find out that every Ridgit table saw they had in stock had a warped cast iron table.

You console looks good, but it isn't childproof lol. My 3 year old son and my 2 year niece kept turning on / off all of my equipment. They eventually damaged 3 of my monoblock Outlaw amps and the X4000 AVR. Luckily the AVR was under warranty and replaced by a X4200. I had to pay for the monoblock amps to be repaired.

I ended up building a somewhat high console out of some pinewood I had laying around. It isn't the prettiest, but now the kids can't reach my equipment.
 

GFOviedo

Member
Joined
Jun 20, 2017
Messages
636
Some pics of the monster console I built. It took me longer to stain it and paint it than to put it together. Not pretty, but works. I will be building a nicer looking one soon. I've also include a pic of my son and the DUMB DOG!
 

Attachments

  • IMG_1974.JPG
    IMG_1974.JPG
    1.1 MB · Views: 51
  • IMG_1986.JPG
    IMG_1986.JPG
    950.1 KB · Views: 51
  • IMG_1987.JPG
    IMG_1987.JPG
    911.6 KB · Views: 50
  • IMG_2007.JPG
    IMG_2007.JPG
    1.1 MB · Views: 50

tripplej

AV Addict
Joined
Jul 13, 2017
Messages
6,882
More  
Preamp, Processor or Receiver
NAD T-777
Universal / Blu-ray / CD Player
Oppo 103 Blu Ray Player
Front Speakers
7 Paradigm Reference series 8" in ceiling speakers
Subwoofers
2 Paradigm SE Subs
Other Speakers or Equipment
Nintendo Wii U Gaming Console
Video Display Device
Samsung UN75F8000 LED TV
Remote Control
Universal Remote MX-450
Streaming Subscriptions
Sony PS4 Gaming Console, Panamax MR-5100 Surge
Very nice setup. Turned out very well. Congrats! :)
 

Todd Anderson

Editor / Senior Admin
Staff member
Thread Starter
Joined
Jan 20, 2017
Messages
9,264
Location
Balt/Wash Metro
More  
Preamp, Processor or Receiver
StormAudio ISP.24 MK2
Main Amp
Emotiva XPA-5
Additional Amp
Emotiva XPA Gen3 2.8 multichannel amp
Other Amp
Denon X8500H
Computer Audio
AudioEngine A2+
DAC
THX ONYX
Universal / Blu-ray / CD Player
Kaleidescape TERRA, OPPO UDP-203, Panasonic UB9000
Front Speakers
GoldenEar Technology Triton One.R
Center Channel Speaker
GoldenEar Technology SuperCenter Reference
Surround Speakers
SVS Ultra Surround
Surround Back Speakers
SVS Ultra Bookshelf
Front Height Speakers
SVS Prime Elevation x4 (Top Front, Top Mid-Front)
Rear Height Speakers
SVS Prime Elevation x4 (Top Middle, Top Rear)
Subwoofers
dual SVS SB16s + dual PSA XS30s
Other Speakers or Equipment
Behringer 1124p; Aura Bass Shaker Pros; SuperSub X
Video Display Device
JVC NX7
Screen
Seymour Screen Excellence, Enlightor NEO AT Screen
Streaming Equipment
iFi Audio Zen Blue
Streaming Subscriptions
Qobuz, TIDAL, Spotify, ROON
Other Equipment
LG Electronics 65-inch B6 OLED, Sony 65-inch X900F, ZeroSurge 8R15W x 2, ZeroSurge 2R15W x 2
Wow. Climber... 3D rendered pre-build pictures?? Love it! That's a serious endeavor there. Great pictures!
 

Todd Anderson

Editor / Senior Admin
Staff member
Thread Starter
Joined
Jan 20, 2017
Messages
9,264
Location
Balt/Wash Metro
More  
Preamp, Processor or Receiver
StormAudio ISP.24 MK2
Main Amp
Emotiva XPA-5
Additional Amp
Emotiva XPA Gen3 2.8 multichannel amp
Other Amp
Denon X8500H
Computer Audio
AudioEngine A2+
DAC
THX ONYX
Universal / Blu-ray / CD Player
Kaleidescape TERRA, OPPO UDP-203, Panasonic UB9000
Front Speakers
GoldenEar Technology Triton One.R
Center Channel Speaker
GoldenEar Technology SuperCenter Reference
Surround Speakers
SVS Ultra Surround
Surround Back Speakers
SVS Ultra Bookshelf
Front Height Speakers
SVS Prime Elevation x4 (Top Front, Top Mid-Front)
Rear Height Speakers
SVS Prime Elevation x4 (Top Middle, Top Rear)
Subwoofers
dual SVS SB16s + dual PSA XS30s
Other Speakers or Equipment
Behringer 1124p; Aura Bass Shaker Pros; SuperSub X
Video Display Device
JVC NX7
Screen
Seymour Screen Excellence, Enlightor NEO AT Screen
Streaming Equipment
iFi Audio Zen Blue
Streaming Subscriptions
Qobuz, TIDAL, Spotify, ROON
Other Equipment
LG Electronics 65-inch B6 OLED, Sony 65-inch X900F, ZeroSurge 8R15W x 2, ZeroSurge 2R15W x 2
Some pics of the monster console I built. It took me longer to stain it and paint it than to put it together. Not pretty, but works. I will be building a nicer looking one soon. I've also include a pic of my son and the DUMB DOG!


GFO... awesome console! Visually, very appealing. :T

What's the story with the mud picture? :redgrin:
 

GFOviedo

Member
Joined
Jun 20, 2017
Messages
636
GFO... awesome console! Visually, very appealing. :T

What's the story with the mud picture? :redgrin:

wow....where should I start! Pretty much I cemented most of the backyard already, but left that little opening for the water lines. However, Jovani and the stupid dog (Rocco) manage to make more of a mess from that little hole than when we used to have a large area of dirt.
 

climber07

Member
Joined
Jul 23, 2017
Messages
69
I would have to question your abilities as a father if your child didn't find the only mud hole in the area and make a huge mess. That pic was priceless.
 

climber07

Member
Joined
Jul 23, 2017
Messages
69
Added some new pics a few posts back. Here are some completed and installed pics. Wire management is a challenge to say the least.

20140930_140752.jpg 20140930_130806.jpg 20140930_122946.jpg 20140930_120701.jpg 20140930_120651.jpg 20140929_223956.jpg

Old entertainment center re-purposed to the bedroom. Fits perfectly in the space provided.

20140930_000848.jpg


More completed and fully installed pics (new pics with the new S7201 to follow soon as I have to photograph, stitch, and tone map the HDR images... time consuming):

dsc_0909-jpg.3308

dsc_0911-jpg.3309

dsc_0912-jpg.3310
 

Attachments

  • DSC_0909.JPG
    12.1 MB · Views: 326
  • DSC_0911.JPG
    11.8 MB · Views: 323
  • DSC_0912.JPG
    12.4 MB · Views: 322
  • DSC_0913.JPG
    12.1 MB · Views: 26
Last edited:

climber07

Member
Joined
Jul 23, 2017
Messages
69
A couple more

DSC07933.JPG DSC07936.JPG DSC07938.JPG DSC07939.JPG
home-thearer-hdr-2-2-jpg.3326


Here's one with some creative tone mapping applied

home-theater-hdr-enhanced-jpg.3327


Here's a pano shot.

home-theater-pano-tone-mapped-jpg.3328


Thank you for viewing. A lot of hard work and love went into this console. I built it to be tough as nails and vibration proof. I wanted to be able to lift on the top to move the entire loaded console without worrying about anything cracking or breaking (hence the 230+ pocket screws). I'm hoping that this will be a piece of furniture that grandchildren will look at with fond memories and pride.
 

Attachments

  • Home Thearer HDR-2-2.jpg
    1.4 MB · Views: 307
  • Home Theater HDR Enhanced.jpg
    15.9 MB · Views: 314
  • Home Theater Pano Tone Mapped.jpg
    37.1 MB · Views: 306
Last edited:

Todd Anderson

Editor / Senior Admin
Staff member
Thread Starter
Joined
Jan 20, 2017
Messages
9,264
Location
Balt/Wash Metro
More  
Preamp, Processor or Receiver
StormAudio ISP.24 MK2
Main Amp
Emotiva XPA-5
Additional Amp
Emotiva XPA Gen3 2.8 multichannel amp
Other Amp
Denon X8500H
Computer Audio
AudioEngine A2+
DAC
THX ONYX
Universal / Blu-ray / CD Player
Kaleidescape TERRA, OPPO UDP-203, Panasonic UB9000
Front Speakers
GoldenEar Technology Triton One.R
Center Channel Speaker
GoldenEar Technology SuperCenter Reference
Surround Speakers
SVS Ultra Surround
Surround Back Speakers
SVS Ultra Bookshelf
Front Height Speakers
SVS Prime Elevation x4 (Top Front, Top Mid-Front)
Rear Height Speakers
SVS Prime Elevation x4 (Top Middle, Top Rear)
Subwoofers
dual SVS SB16s + dual PSA XS30s
Other Speakers or Equipment
Behringer 1124p; Aura Bass Shaker Pros; SuperSub X
Video Display Device
JVC NX7
Screen
Seymour Screen Excellence, Enlightor NEO AT Screen
Streaming Equipment
iFi Audio Zen Blue
Streaming Subscriptions
Qobuz, TIDAL, Spotify, ROON
Other Equipment
LG Electronics 65-inch B6 OLED, Sony 65-inch X900F, ZeroSurge 8R15W x 2, ZeroSurge 2R15W x 2
Climber... wow... you have quite a talent. That console is above and beyond! I'm looking for the "you're hired" button... can't seem to find it! :T

You gotta log that system into the AV SHOWCASE. Especially with that new PSA onboard! ;-)
 

climber07

Member
Joined
Jul 23, 2017
Messages
69
Climber... wow... you have quite a talent. That console is above and beyond! I'm looking for the "you're hired" button... can't seem to find it! :T

You gotta log that system into the AV SHOWCASE. Especially with that new PSA onboard! ;-)

Let me get a good HDR image this weekend. Thank you for the compliment. I wish I could fully retire and build stuff. I like building PCs too.
 

tripplej

AV Addict
Joined
Jul 13, 2017
Messages
6,882
More  
Preamp, Processor or Receiver
NAD T-777
Universal / Blu-ray / CD Player
Oppo 103 Blu Ray Player
Front Speakers
7 Paradigm Reference series 8" in ceiling speakers
Subwoofers
2 Paradigm SE Subs
Other Speakers or Equipment
Nintendo Wii U Gaming Console
Video Display Device
Samsung UN75F8000 LED TV
Remote Control
Universal Remote MX-450
Streaming Subscriptions
Sony PS4 Gaming Console, Panamax MR-5100 Surge
I agree with Todd. Gorgeous setup and build. :)
 
Top Bottom